• About Me

tales of a pastry chef

~ I'm a pastry chef and blogger who loves to cook, eat and travel. follow my adventures through food with tips, tricks, recipes and reviews.

tales of a pastry chef

Category Archives: cream

Roasted vegetable and goats cheese quiche

05 Thursday May 2011

Posted by Tales of a London Girl in asparagus, broccoli, cheese, chilli, cream, egg, garlic, leek, pastry, pepper, tart, tomato

≈ Leave a comment

I was pretty tired on Monday evening and all i wanted to do was curl up in front of a movie with a big creamy bowl of pasta. Sadly, this was not to be. After an extended and heavenly break from the gym whilst we were in Boston and then over the weekend, me and Hayls were finally dragging ourselves back to the gym. As we always get back just before dinner, i needed something that i could prep mostly in advance and then just get Alex to finish off. Quiche is what popped into my mind, namely a roasted vegetable and goats cheese quiche. It’s something that feels indulgent and comforting but when you pack it full of veggies and have it with salad it’s actually not too bad. And it tastes good, which is what we’re really after.It’s also light enough for spring, as much as I love hearty, rich dishes that make you dream of curling up by the fire, it’s no longer so appealing once it’s hitting 90 degrees so we have to go for something that still gives you the comfort level, just minus the stodge. The other great thing about a quiche is that you can really put absolutely anything in it. It’s a good way to use up scraps of whatever’s knocking around your fridge looking lonely and a bit neglected, you just swathe it in a coat of cream, egg and cheese, and there you go, you’ve made something pretty damn luxurious.
Having said that, you do still have to think of what will taste good together, i wouldn’t recommend hurling in absolutely everything that’s hanging around the veg drawer and hoping for the best as you might just end up ruining it.

This will feed 4-6 as a starter or light dinner

For the pastry:
200g plain flour
5g salt
100g cold cubed butter
up to 60ml water (although i often find you only need about half that)

Combine the flour and salt in a bowl and rub in the butter until it looks like wet sand. Add enough water so that the dough forms a ball, then flatten out into a disc, cling film and put in the fridge to chill for about 30 minutes (or longer if you need to). Everyone usually says to put it into the fridge in a ball but it chills much faster and more evenly if you flatten it.

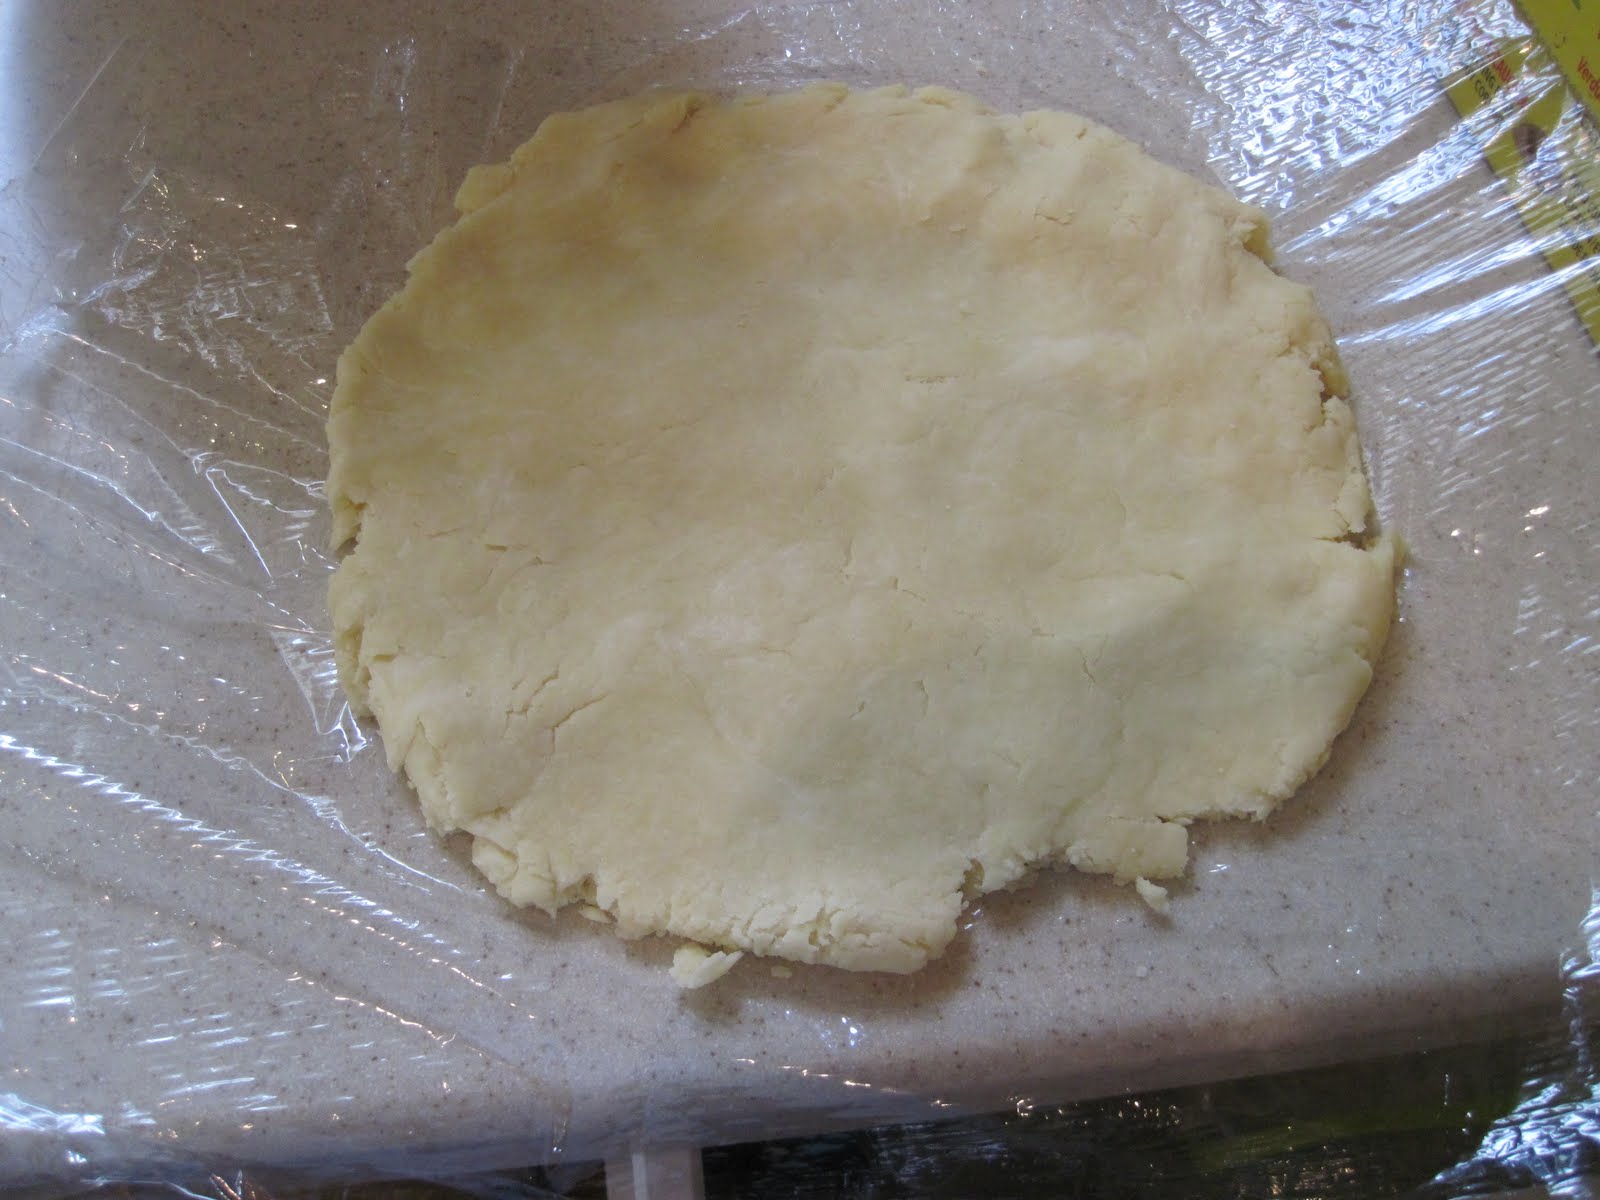
When it’s ready, preheat the oven to 180C/350F. then roll out the pastry and line your tart case. Prick the base all over with a fork and then put it back in the fridge for 10 minutes.

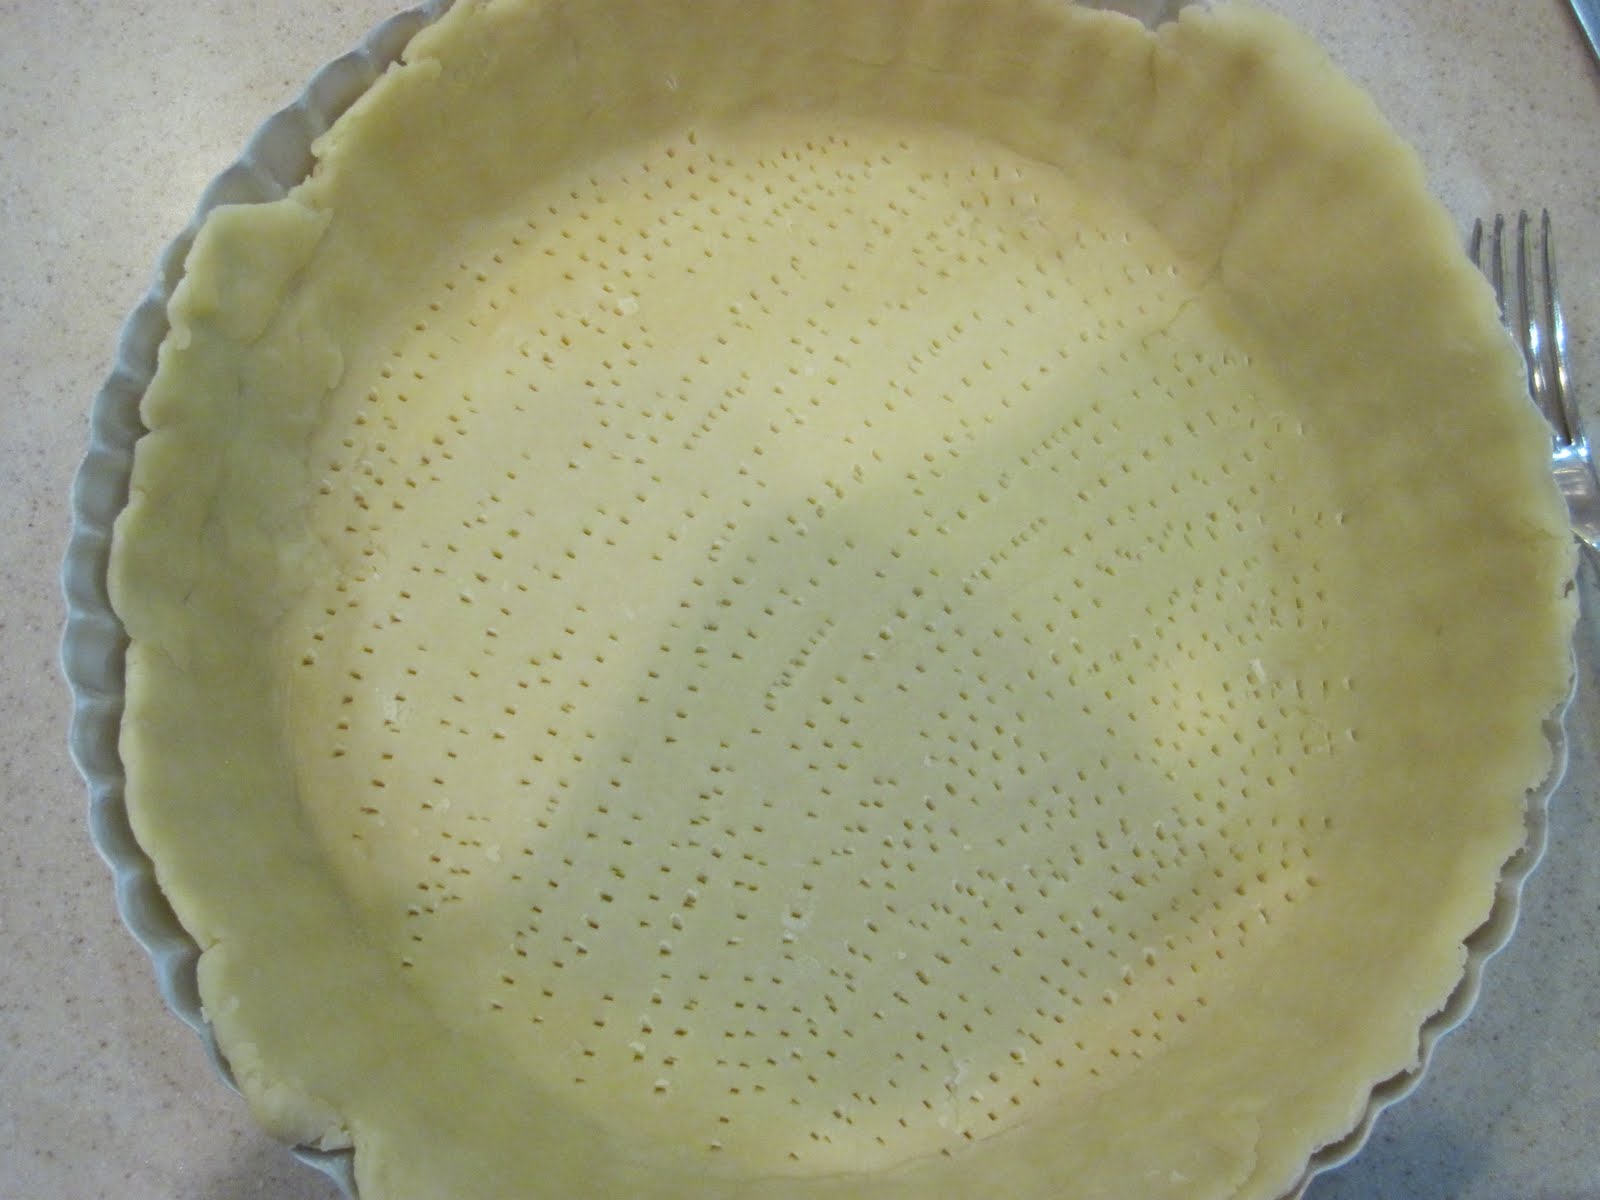
Once it’s chilled out in the fridge again, line with parchment paper and fill with baking beans or rice, anything that will weight it down basically. I am aware that i’ve used tin foil here but we’d run out of parchment so i had to make do with this. The point of pricking the base and then weighting it down is to stop the pastry shrinking down the sides of the tin, which it just loves to do. This is called blind baking and if you skip this step you’ll just end up with a sad, heavy lump of pastry in the bottom of the tart tin and there’ll be nowhere for the filling to go. That doesn’t sound so tempting does it?

Blind bake it for about 20 minutes until the sides feel like they’ve set and are starting to lightly colour – about 20 minutes

Then pop it back in for 5-10 minutes until the bottom isn’t looking doughy anymore. And that’s the pastry done, not so difficult. Shortcrust pastry is the easiest one to make as it’s the most forgiving. If your pastry tears as you’re rolling it out or filling the tart tin, it doesn’t matter. Simply rip a bit off from somewhere else and patch it, it’ll forgive you and, once the filling is in, no one will even be able to tell. Alex had to do it on this tart when he rolled the pastry out for me as the dough had been in the fridge for quite a while and was really cold when it came out. Although the crust is all uneven, as you can see, it doesn’t matter, it’ll still taste delicious and it proves that it’s homemade. Throw the word rustic around a little bit and no one can say a word about what it looks like. Anyway, on to the filling….

Filling:
4 tomatoes, cut into quarters
1 red pepper cut into chunks
Half a big red onion in chunks
1 leek, chunked again
8 spears of asparagus
3/4 head broccoli, broken into florets and boiled for about 6 minutes
250ml double cream
1 egg
70g soft goats cheese
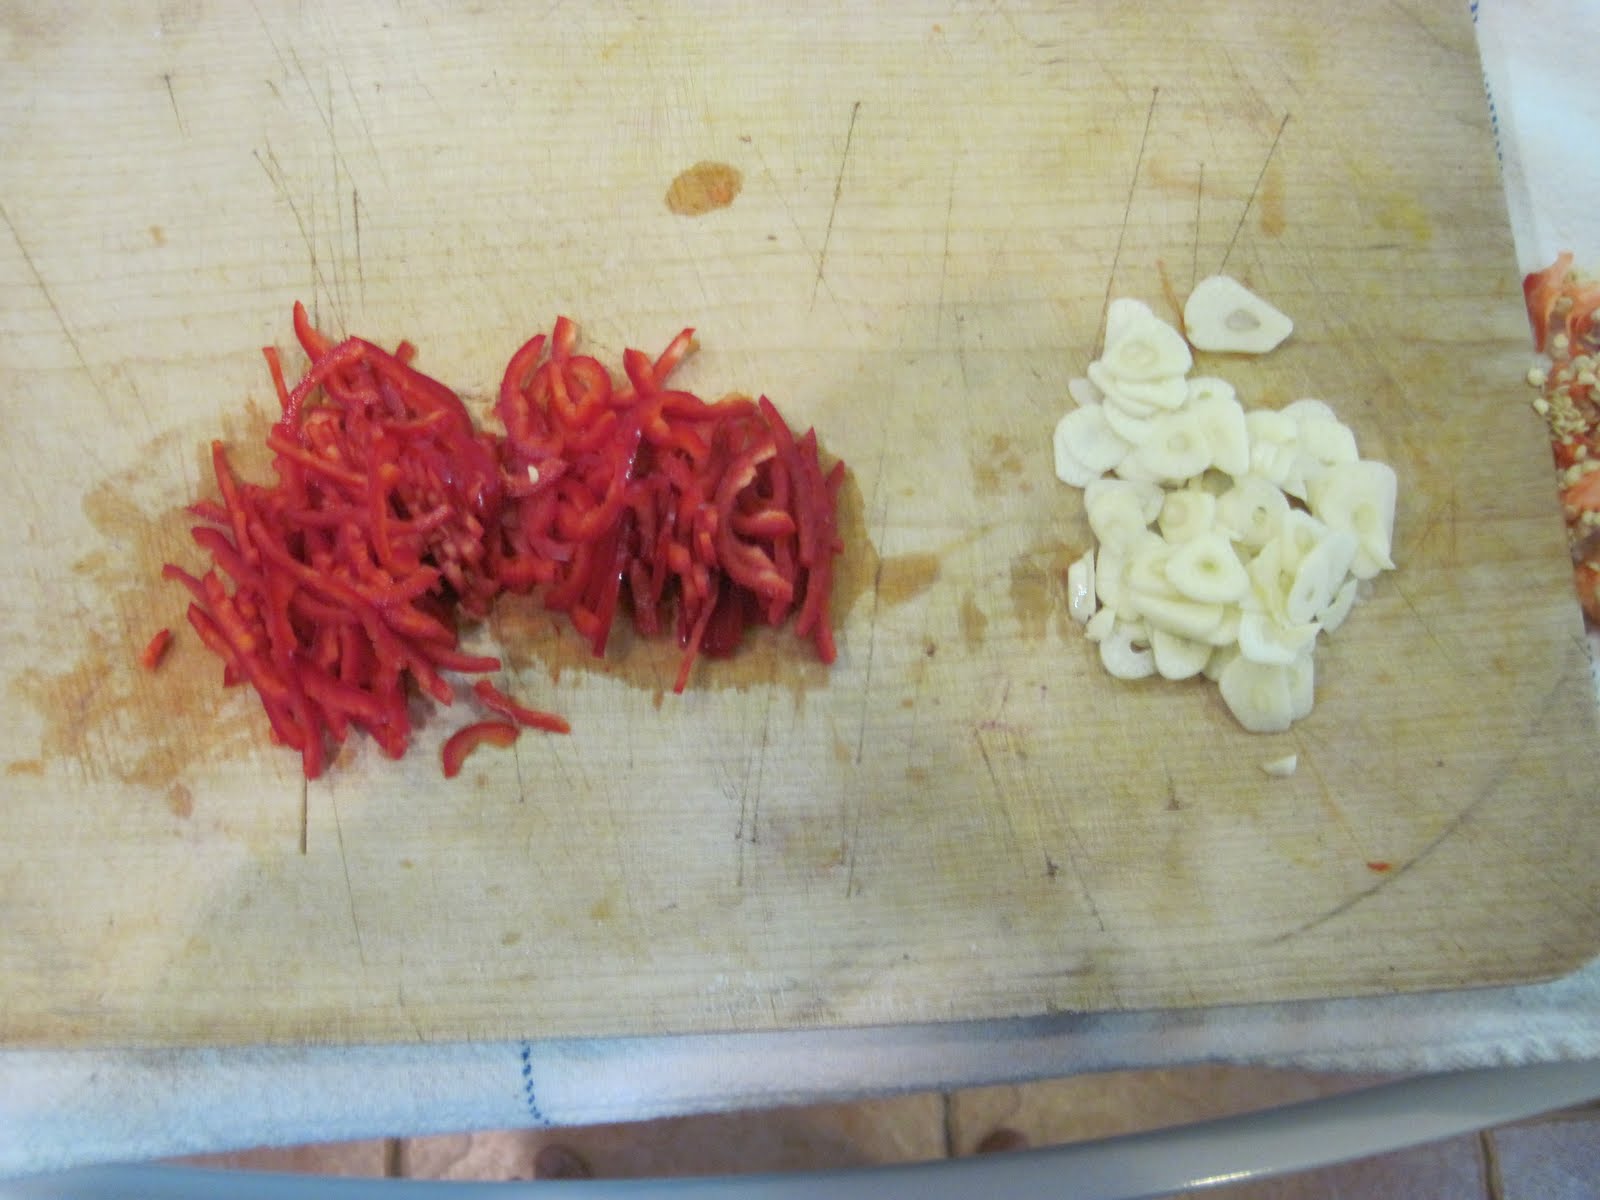
3 fresh red chillis
4 cloves of garlic.

Ok, first things first, preheat the oven to 160C/320F. Snap the ends off the asparagus- grab hold of each end and bend, the asparagus will snap naturally where the sugars have built up and therefore just leave you with the good bit. Then chuck the tomato, pepper, leek, onion and asparagus into a roasting tin, add a glug of olive, some salt and pepper and give it all a good shake about. Bung it in the oven for about 30 minutes until everything is just beginning to caramelise.

Next up, deseed your chillis and slice them, and, whilst you’re at it, slice the garlic too, then fry it all in a pan until the garlic is very lightly golden.

Next, whisk together the egg and double cream, and now, i think we’re ready to put this bad boy together.
Put the roasted veg mix, the chilli, garlic and broccoli into the tart case. Make sure you get a spatula and scrape out the roasting tin as there’s lots of yumminess to be had in there. Pour over the egg/cream mix and give the whole lot a little stir around so everything’s nicely coated. Press it all down so you have a fairly even layer and then dot over the goats cheese so it ends up looking like this.

Pop it in your still hot oven for about 30-40 minutes until the filling is set and the top is golden, if it starts to colour too much on the top, whack a bit of tin foil over it. Hopefully, it’ll end up looking something like this.

Cool on a wire rack for 10 mins and then transfer onto a board or plate to serve.I like to just plonk this down on the table with a big green salad and a bottle of wine and just let everyone help themselves. This isn’t supposed to be anything snazzy, just relaxed and tasty, which is just how it ended up. It’s also such a nice way to eat if you’re just with a group of friends, there’s nothing worse than having to have a big formal meal when you’re just feeling tired and lazy and it also gets everyone talking. In short, it’s a bit of midweek perfection. So if you fancy a change one night then give it a whirl.

Share this:

  • Facebook
  • Twitter
  • Pinterest
  • Print
  • Email
  • More
  • Tumblr
  • Reddit
  • LinkedIn

Like this:

Like Loading...

Another day in Pav-adise

22 Friday Apr 2011

Posted by Tales of a London Girl in chocolate, cream, meringue, pavlova

≈ 1 Comment

I’m pretty sure i’ve been thinking about starting a food blog for almost a year now, and i’ve been seriously talking about it for a few months. However a combination of my hideous habit of procrastination coupled with an innate fear of computers has held me back. But no more, i’ve finally decided to pull my finger out and start. This is also partly because, living on an island where the majority of the food leaves a lot to be desired, all i do is dream of food so i figured i should unload some of it on you guys.

Well, definitely not the most exiting way to kick things off but here we go, the first recipe of the brand new blog. We’re going for pavlova, mainly (ok, only) because when i awoke yesterday morning Alex’s mum requested one for her dinner party of 14 tonight. To be honest, that’s fine by me as it’s so easy it means i can wizz through it and head out on the boat.

There is definitely something to be said for a dessert that takes minimal time but is always delicious, whilst i’ll quite happily while away the hours making an elaborate dessert, sometimes it’s great just to be able to whip something up in the flashiest of flashes and know that everyone will love it. It also means that i don’t have to worry about whether it will be child friendly. I think we have a few tiny guests tonight and i’m yet to meet a child who turns their nose up at pavlova (i’ve clearly just jinxed myself now and the children will hate it, fingers crossed this is not the case).

 Also, i’ve found that a lot of people this side of the pond have never heard of pavlova and are delighted by all aspects of it, it’s obviously more of an english/aussie thing.For those of you that do fall into the ‘what the hell is that’ category, it’s basically a giant meringue, cooked so it’s nice and chewy on the middle and crispy on the outside. Once that’s all cooked, you whip up some cream so it’s all thick and billowy and smother that over the (cooled) meringue. Finally top it with the fruit of your choice and some kind of sauce if you want one- i usually do, i definitely follow the ‘everything is better with a sauce’ school of thought.

So anyway, a recipe is usually fairly helpful in this kind of situation so here we go:

Obviously i’m making this for 14 so you might want to scale it down a bit

For the meringue:

210g of egg whites ( i know it sounds like a pain but it’s SO much easier, and more precise to weigh them)

210g caster sugar

5g cocoa powder

Ok, first things first- make sure your bowl is clean. I mean super clean. Any trace of fat or oil at all and your egg whites will not whip. Preheat your oven to 150C/300F. Whisk your egg whites until they are really frothy and starting to look kind of thick. At this point you want to start adding your sugar, gradually. Either in thirds or just very slowly if you’re using an electric whisk or kitchen aid. I would seriously recommend this by the way or you’ll have a seriously tired arm by the end. That is of course unless you’re trying to beef up, in which case, do it by hand- just remember to switch arms half way.

It’s done when you can tip the bowl over your head and not end up looking like you’re wearing a smurf hat. I know it’s a cliche but it works. When it’s ready, spread it out onto a baking tray lined with parchment paper. If you have a silmat, AMAZING, use that, if you don’t and you bake a lot, buy one, they’re invaluable.

Once it’s spread out (into whatever shape takes your fancy, i’m liking rectangles at the moment) dust it lightly with the cocoa powder and swirl it in with a skewer. Pop it into the oven for about 1 hour 15 mins. Check it after an hour though, just to be on the safe side, you want it crispy on top but still a bit sticky, gooey inside as it will harden a little as it cools.


For the cream:

500ml double or whipping cream (heavy in the us)
2 tbsp icing sugar
1 tsp vanilla extract- if you can avoid vanilla essence then do, it’s usually not even from vanilla

Whip the cream, vanilla and icing sugar to soft peak- so it looks like this.


Then smear all over the meringue. Simple.

For the fruit:

I personally like quite a lot of fruit but if you want a bit more or a bit less then go for it.

2 1/2 punnets strawberries

Zest of an orange, juice of half.

Chop the strawberries into chunks, i wouldn’t worry about size or shape her, just go for whatever you feel like. Then finely grate the zest over and squeeze over the juice, toss it all together and leave everything to get cosy together for a while whilst you do everything else.


For the sauce:
This is such a simple sauce but it’s a really useful one, after all, who doesn’t like a bit of chocolate sauce every now and again?
100g dark chocolate
100g cream (the same as you used earlier for the whipped cream)
10g butter

Break the chocolate into little chunks (or, of course, you can buy chocolate chips). Heat the cream and then pour over the chocolate and stir until all the chocolate has melted. You can obviously use the traditional method of melting the chocoate in a bain-marie and heating the cream separately before mixing the two together. When it’s such a tiny amount though, it just seems easier to me to do it this way. Anyway, once you have you’re chocolate and cream combined then stir in 10g of butter cut into chunks. And thats it, It takes less than 5 minutes and is seriously simple.

Assembly:

Right, two tips for assembling this. Firstly, i know it sounds pretty obvious, but wait until the meringue is fully cold or all the cream will melt and you’ll have a wet soggy mess on your hands. Secondly i wouldn’t assemble this in a pristine white dress, 5 mintues before you’re due to go out for dinner as i did, it’s pretty nerve racking when drizzling on the chocolate sauce! OK, before you start putting it together, put the meringue base onto whatever plate you’re serving it on as it’ll be so much harder to transfer when it’s all put together. Next, dollop on your cream and smoosh it all over until you only have a border of about 1 inch of meringue still showing (i only do this because i think it looks nicer so feel free to go all the way to the edge if you want). then evenly spoon over your strawberries, probably best to use a slotted spoon so it doesn’t all get too wet and then simply sppon or drizzle over the chocolate sauce and hey presto, pudding’s done.

Share this:

  • Facebook
  • Twitter
  • Pinterest
  • Print
  • Email
  • More
  • Tumblr
  • Reddit
  • LinkedIn

Like this:

Like Loading...

Click to follow me and I'll keep you updated with all the yummy goings on

Recent Posts

  • Baked Apples
  • Courgette, Cavalo Nero and Butter Bean Soup
  • Bagels with salt beef and wild rocket
  • Easter baking part 2: Hot Cross Buns
  • Easter baking part one: Chocolate nests

Archives

  • October 2012
  • June 2012
  • April 2012
  • March 2012
  • February 2012
  • January 2012
  • December 2011
  • November 2011
  • October 2011
  • August 2011
  • July 2011
  • June 2011
  • May 2011
  • April 2011

Twitter Updates

Error: Twitter did not respond. Please wait a few minutes and refresh this page.

Meta

  • Register
  • Log in
  • Entries feed
  • Comments feed
  • WordPress.com

Create a free website or blog at WordPress.com.

Privacy & Cookies: This site uses cookies. By continuing to use this website, you agree to their use.
To find out more, including how to control cookies, see here: Cookie Policy
  • Follow Following
    • tales of a pastry chef
    • Already have a WordPress.com account? Log in now.
    • tales of a pastry chef
    • Customize
    • Follow Following
    • Sign up
    • Log in
    • Report this content
    • View site in Reader
    • Manage subscriptions
    • Collapse this bar
%d bloggers like this: